Let’s dive into our latest features and exceed your business goals.
New Features in Yorodesk
Forgot Password
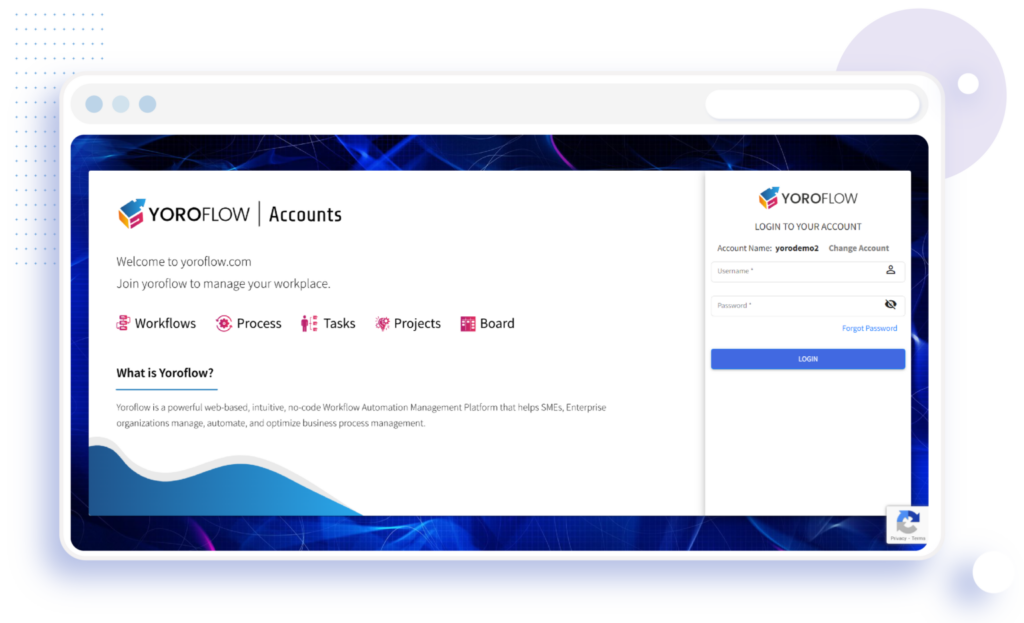
- Use your login credentials (Username and Password) to access the Yoroflow account in the Login screen.
- If you forgot your password, click ‘Forgot Password’.
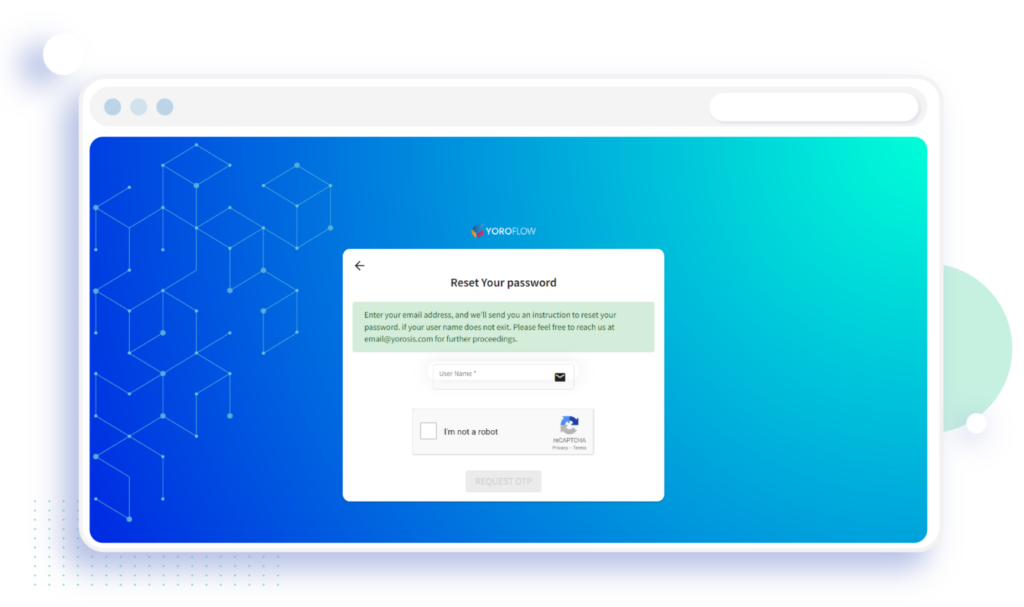
- Here you can reset your password. Enter your username in this dialogue box and tap the ‘Request OTP’ button.
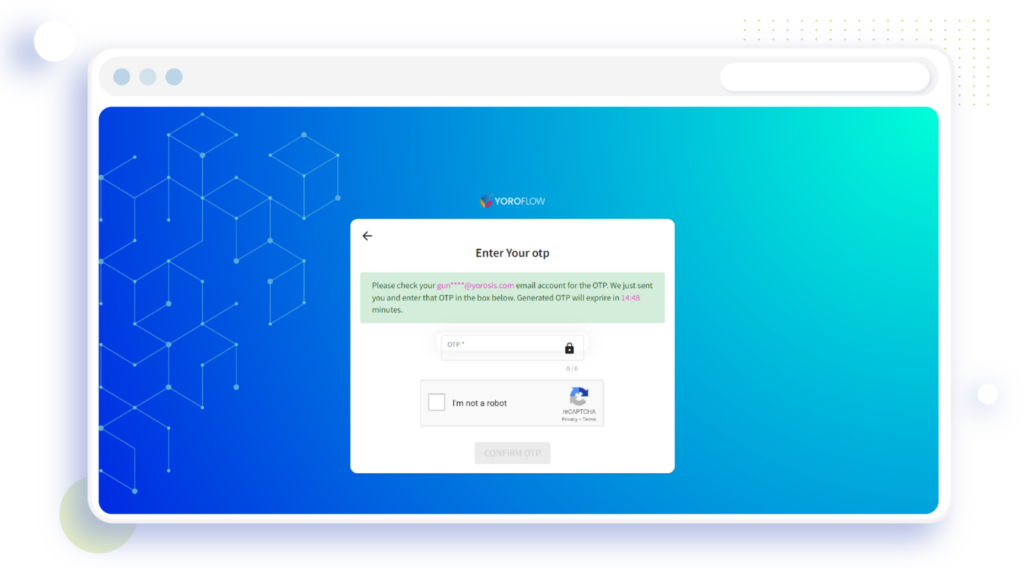
- Now you receive OTP through your email account.
- Enter that OTP in the dialogue box and tap the ‘Confirm OTP’ button.
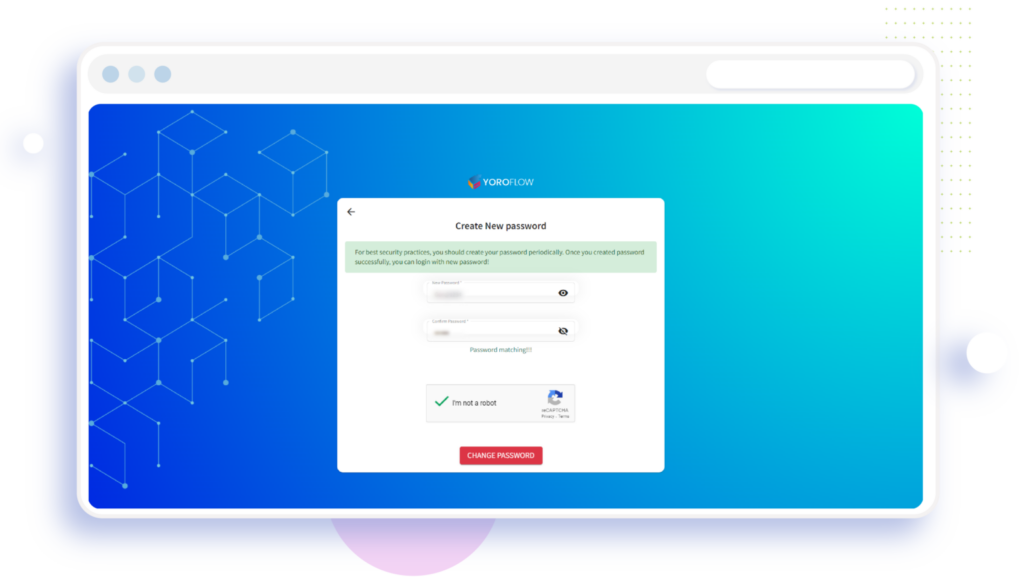
- On this screen, enter your new password and confirm the password as shown below.
- Next, tap the ‘Change Password’ button. The new password is saved.
- Now, you can login with a new password to access your Yoroflow account.
Mail Comments
The email that the user is not creating a new ticket despite the mail handler being configured. Instead, it adds a comment to a past ticket.
In Yorodesk, if a new issue has to be created with the mail sent by a specific user, a new mail should be used. The past one will add comments to the ticket that the ticket ID corresponds to.
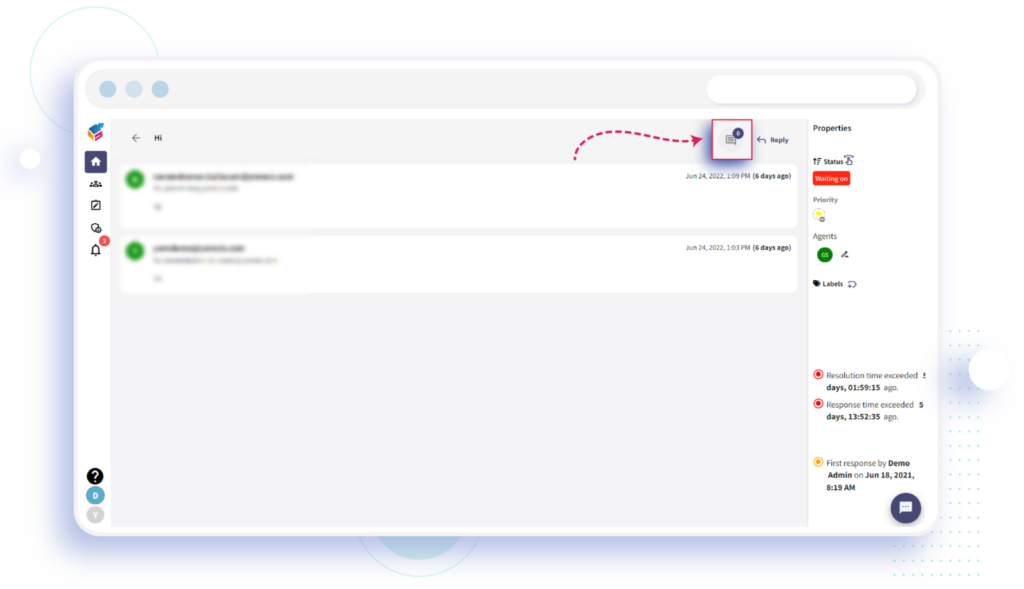
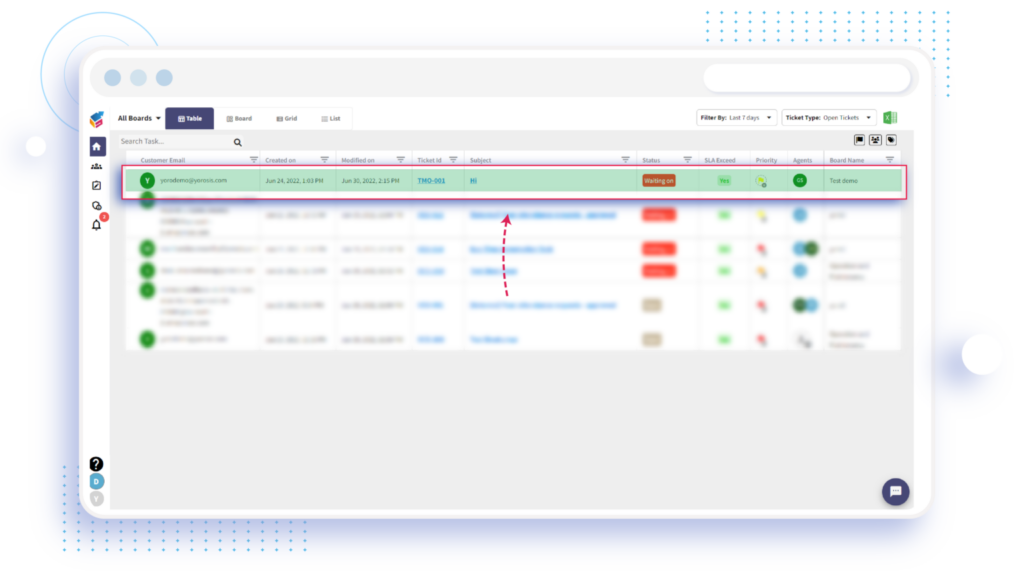
- In the ‘My Ticket’ tab, select any ticket using ticket ID.
- In the Yorodesk email ticketing system, click the ‘Comment’ icon on the top right corner.
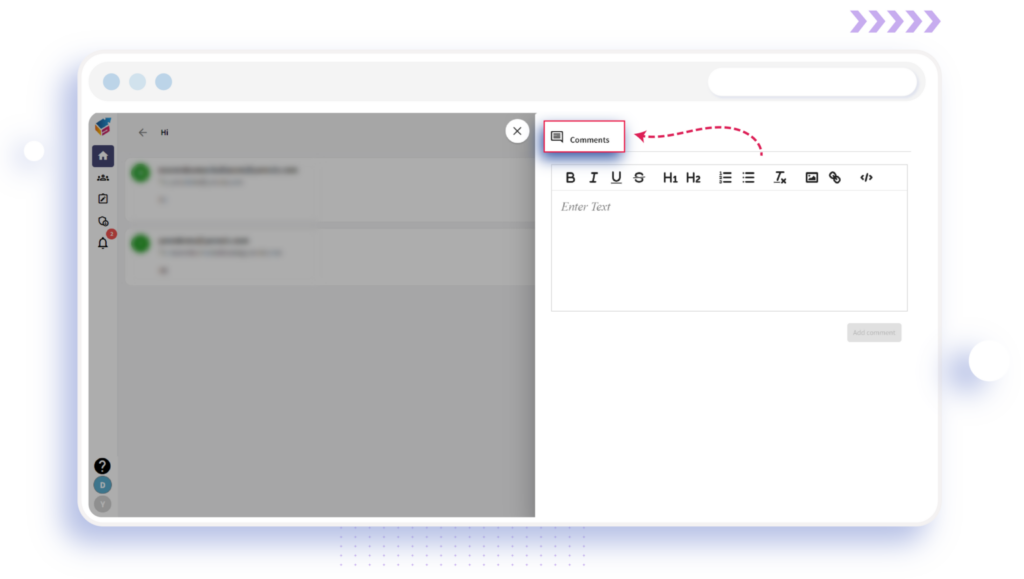
- Enter your comments in the text format as shown on the below screen.
- Then, tap the ‘Add Comment’ button.
- Your comment is automatically sent to that specific agent’s email account.
Automatic Ticket Refresh
It will work when there is a reply added to the ticket or there is a property update within the ticket.
- In Yorodesk, the auto-refresh notification gives you live updates on the ticket.
- The notification would show up in the green colour as shown below.
- It shows the number of updates to the ticket created by other agents or the customers since the ticket was open.
Ticket Collision Detection
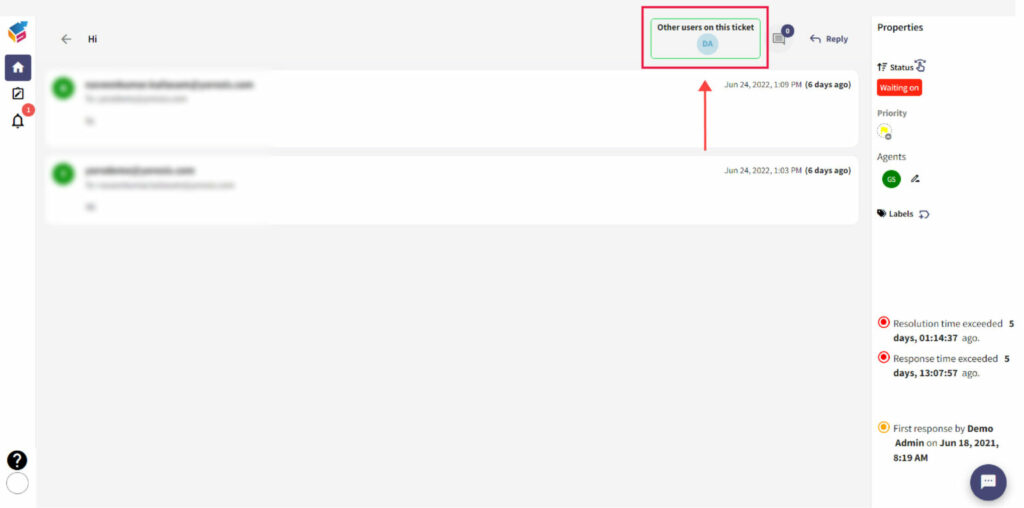
You can see the activities on the tickets in the ticket view. Providing agents visibility of each other’s presence in a ticket can help ensure that different agents do not reply on the similar user at the same time.
- Ticket collision detection feature helps to prevent situation in which few agents are working on the same ticket.
- In Yorodesk, go to the ticket and view this feature in the top right corner of the screen.
Response / Resolution time in Mail View
It is very sensible for your customers to expect that you solve their tickets within an acceptable and reasonable time period. If not for a situation, an immediate response to their mail. While it is indeed especially for your team to respond and resolve tickets faster, here are a few means to bring in clarity in your approach:
- SLA Response Time
- SLA Resolution Times
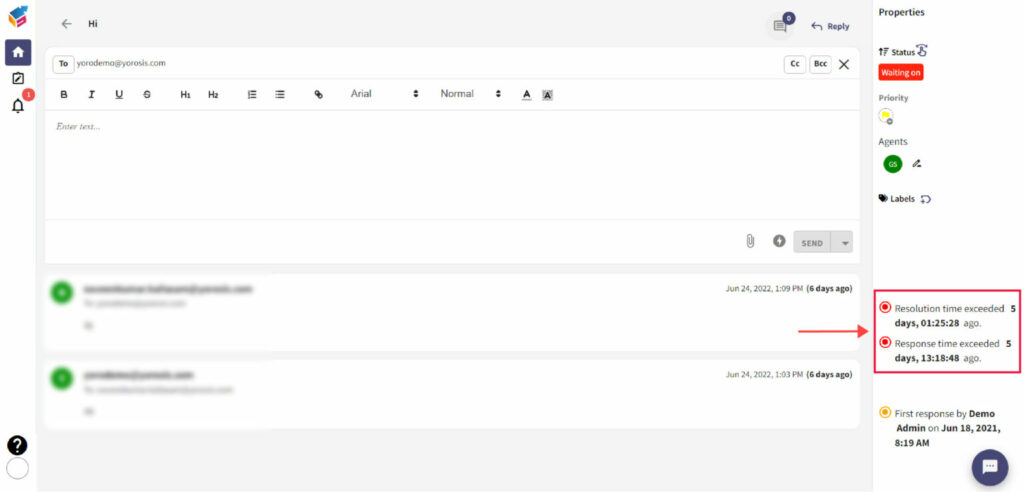
- As shown on the Yorodesk mail view, you can see the response time that the amount of time between when the agent first creates a ticket and when the provider actually responds.
- Also, you can view the resolution time that the amount of time between when the agent first creates a ticket and when that issue is solved actually.
Status Change Option in Mail
Ticket status change is one of the main fields that help define business rules in the ticketing system and users, and agents track the progress. When Yorodesk assigns a new ticket to the agent, the status automatically changes to open.
- In the ‘My Ticket’ tab, select any ticket using ticket ID.
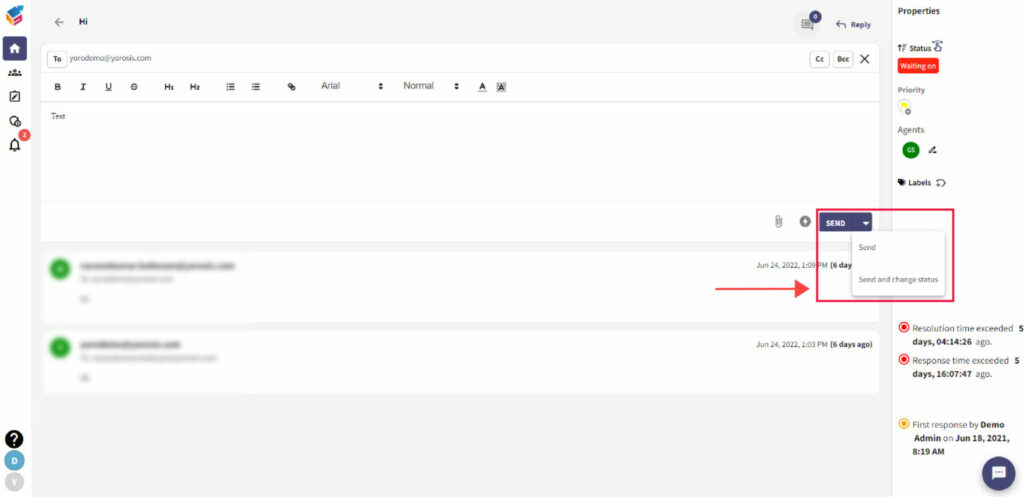
- In Yorodesk email ticketing system, enter the text in the comment box and click the ‘Send’ dropdown button.
- Choose the ‘Send and Change Status’ option from that.
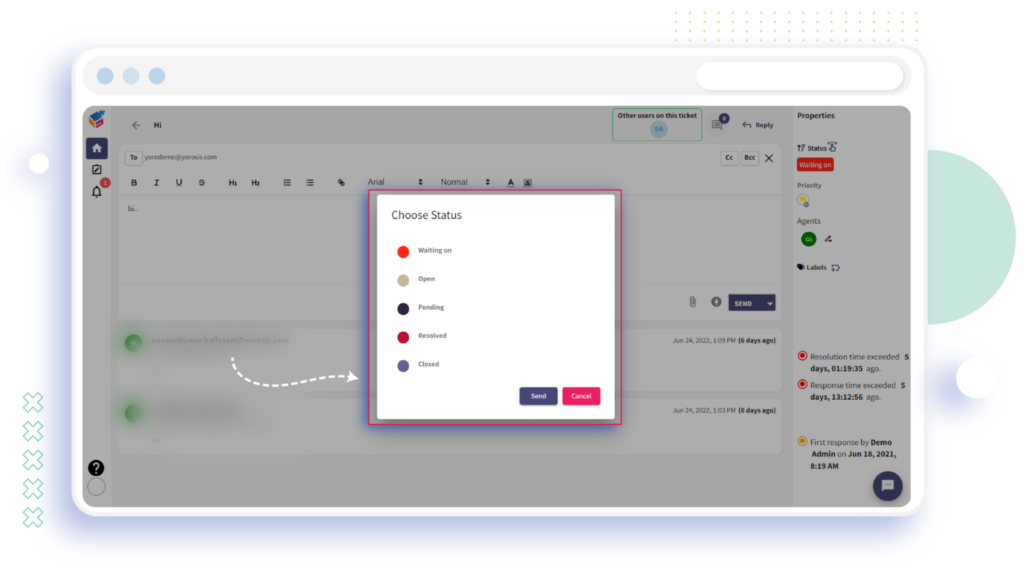
- On the screen below, you can see the different status options.
- Select any one from that list, and click Save button. Now, the status is added into your ticket.
Multi Mail board View
Table View
- In the ‘My Ticket’ tab, click ‘go to board’ on the right side.
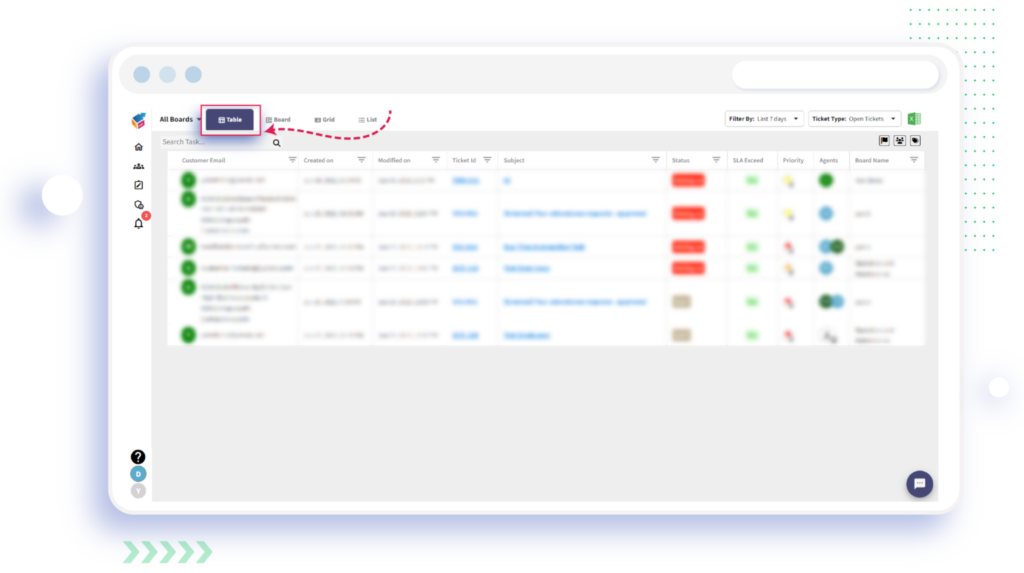
- Tap the Table option on the screen.
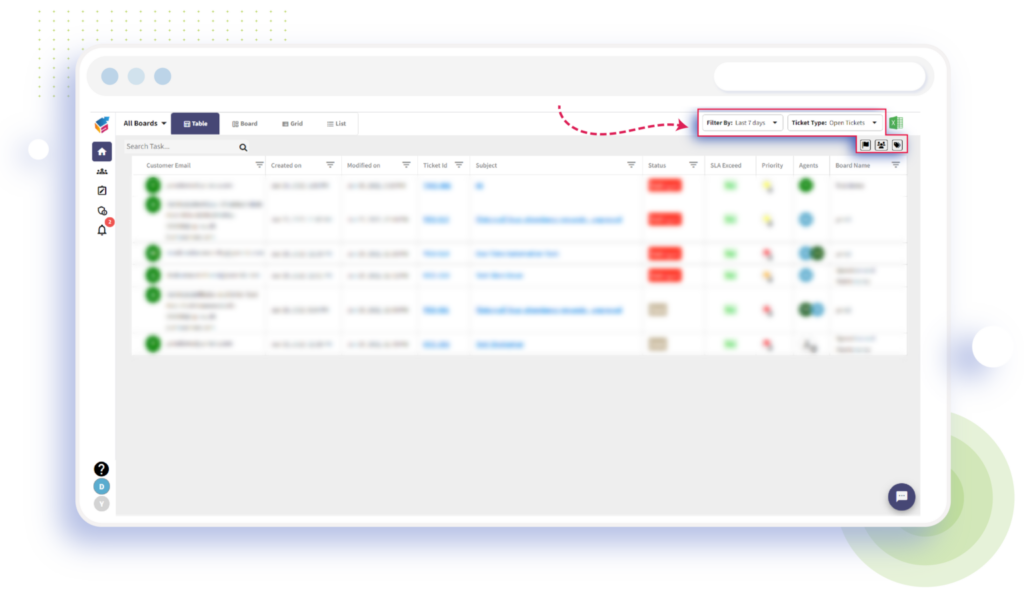
- In Yorodesk, Table feature is used to display the ticket details in the table format including Customer Email, Created On, Modified On, Ticket ID, Subject, Status, SLA, Priority, Agents, and Board Name as shown on the below.
Board View
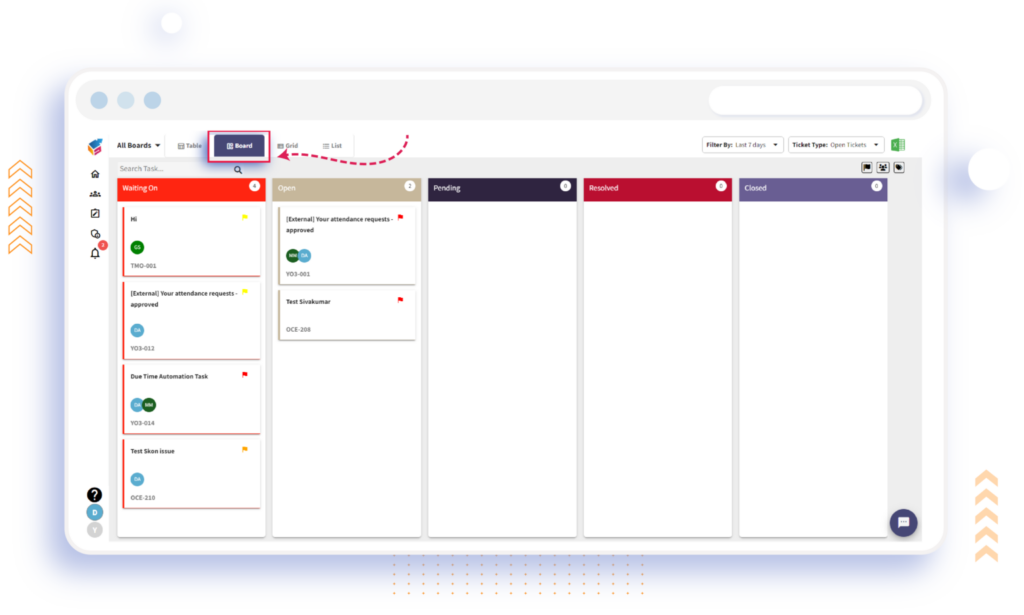
Board consists of tickets arranged in columns as per status. The sorting of tickets depends on the ticket created date. With our Board View feature, you can view all your tickets and todos in a single board style view.
- In the ‘My Ticket’ tab, click ‘go to board’ on the right side.
- Tap the Board option on the screen.
- Yorodesk’s board view is a great way to see data on your board in a different way, to view the breakdowns.
Grid View
- In the ‘My Ticket’ tab, click ‘go to board’ on the right side.
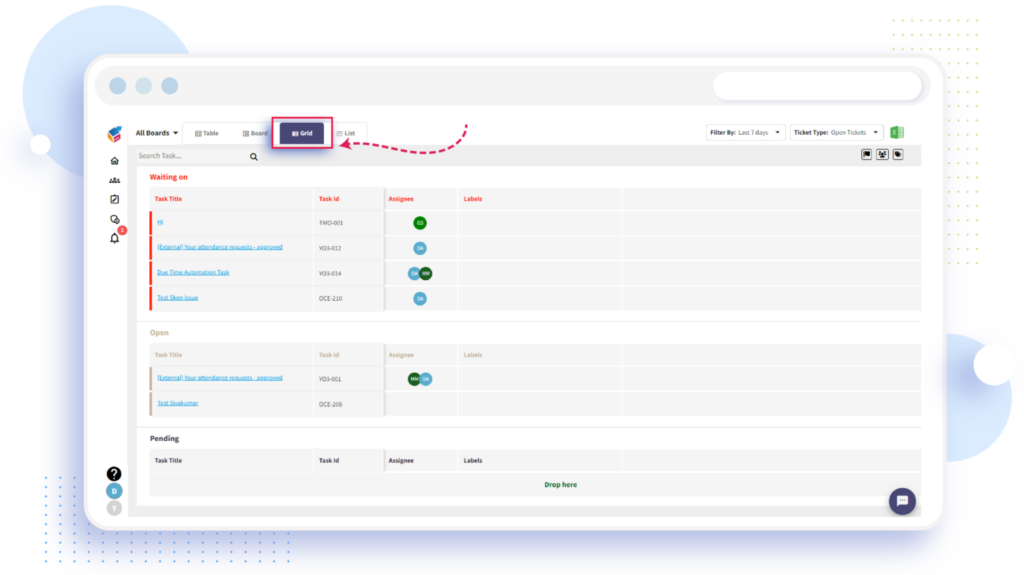
- Tap the Grid option on the screen.
- In this view, every field is displayed in columns as shown below.
Search with (Ticket ID, Subject)
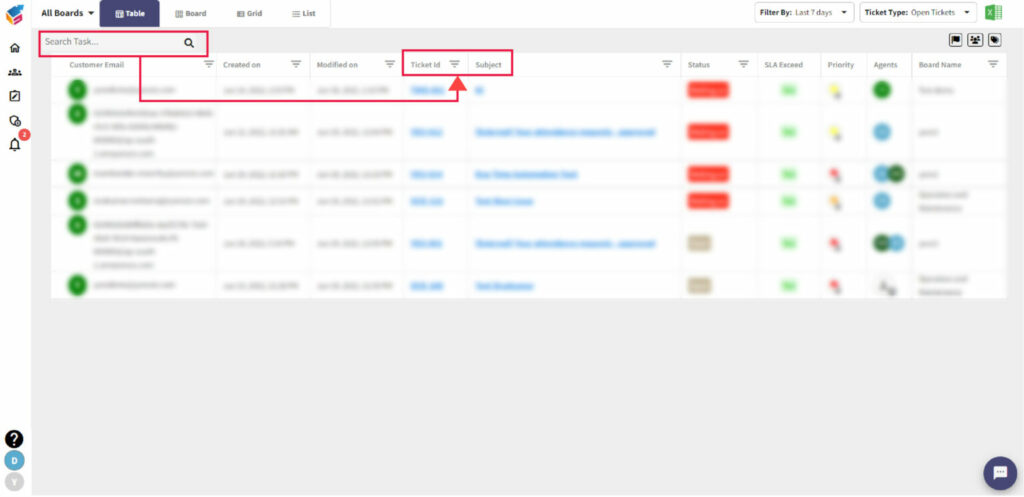
As in an Enterprise Setup, once you have more than 100 tickets, it will be very difficult to search the ticket. That’s why Yorodesk launches this feature like searching with ticket ID or subject.
- In the Table, use search box to find any specific ticket using Ticket ID or subject of that ticket.
- It helps to find out the ticket faster.
Report (Line chart View)
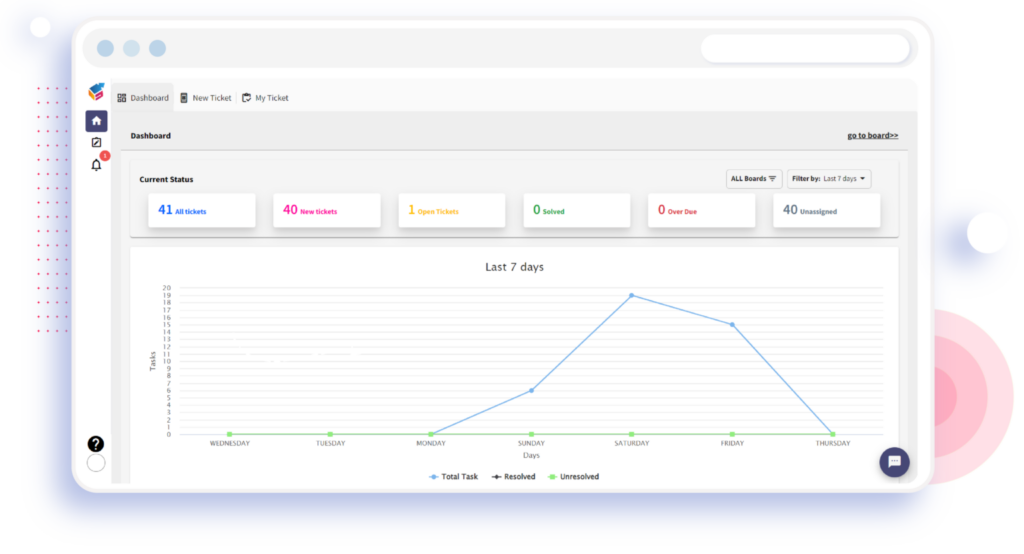
Reports and Dashboards in Yorodesk enable you to measure the overall statistics through a line chart view.
- Go to the ‘My Tickets’ tab, select Dashboard on the top left corner.
- Dashboard shows the overall report in a line chart view. Line charts are useful for showing day-wise report over time.
Mail Attachment
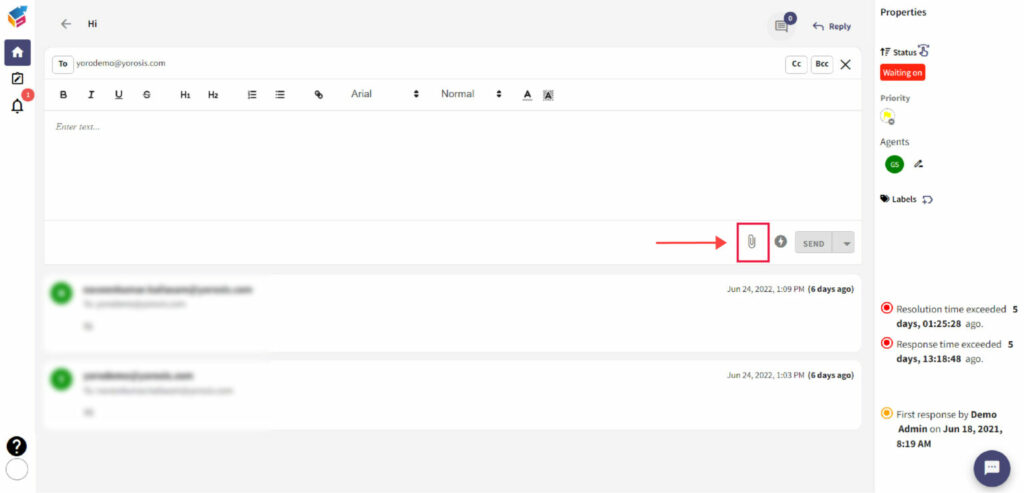
Collaboration and communication are becoming more and more interactive. One of the ways to boost both is to use email attachments to your added advantage.
- In the ‘My Ticket’ tab, select any ticket using ticket ID.
- In Yorodesk email ticketing system, click ‘Attachment’ icon on the right side below.
- Here you can attach any file that you want to share with your agents.
Filters
- Date
- Priority
- Label
- User
- Customize
Date Filter
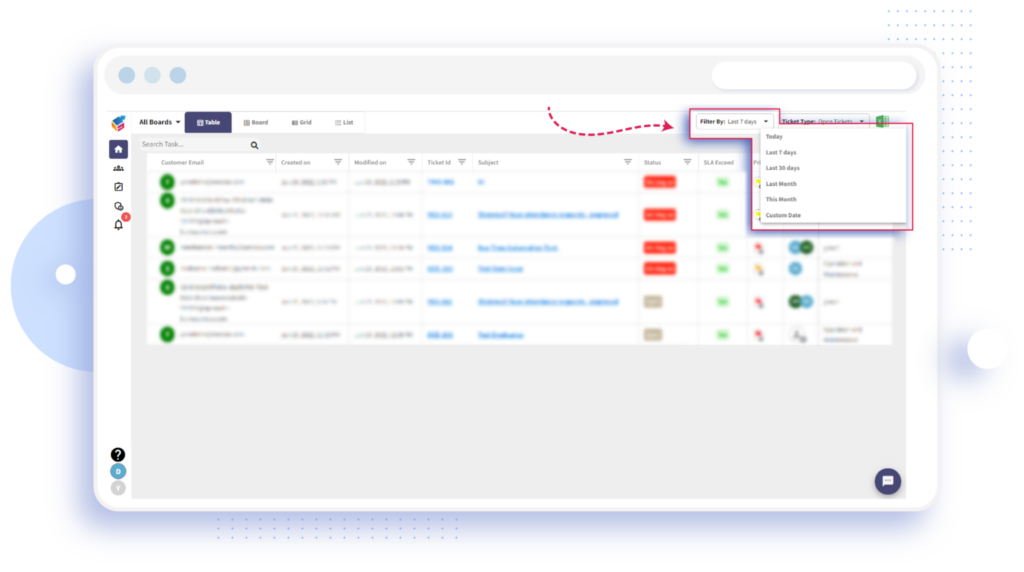
- In the ‘My Ticket’ tab, click ‘go to board’ on the right side.
- Click ‘Filter by’ option on the right-side corner.
- Here you can search the ticket based on the date using this filter option.
Priority Filter
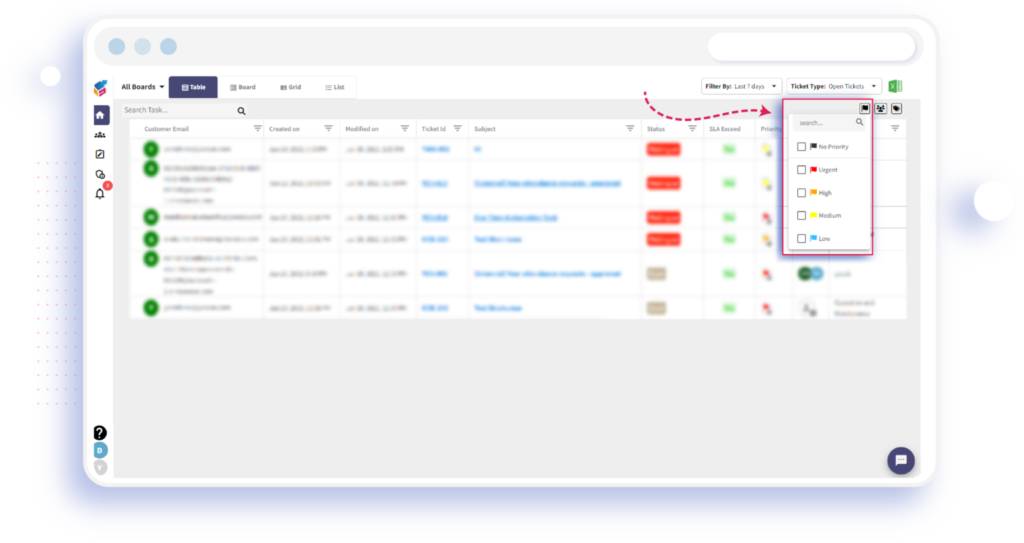
- In the ‘My Ticket’ tab, click ‘go to board’ on the right side.
- Click ‘Priority Filter’ icon on the right-side corner.
- Here you can search the ticket based on the priority using this filter option.
Customize Filter
- In the ‘My Ticket’ tab, click ‘go to board’ on the right side.
- Here you can search the ticket based on the ticket type, label, or users using these filter options in Yorodesk.
Hope you like our add-on features in Yorodesk.

