How to Create Workflow? Step-by-Step Guide

What Is Workflow?

Workflow is a set of fixed tasks or a series performed to achieve a business process in line with a sequence of predefined rules, incorporating task management. Workflow automates the entire business process and implements with precision time by ensuring that the needed data progress from one to another without any interruption. 

What are the steps to Create Workflow?

Here are the 6 steps to create a workflow:

Step 1: Spot Your Resources

Resources that frame a workflow are not just limited to forms and working procedures; also, they include the people in the process. Before workflow creation, speak with process owners to know about the problems they face. For example, if you create a budget approval app, contact your finance team and understand how they are handling the process manually. So, you can easily find out what they would expect from an online workflow management tool.

Step 2: Disclose Tasks That Should be Accomplished 

Structured workflows have a proper graph-like set of tasks to be done in conditional or parallel tasks before moving on. It is necessary to get a complete understanding of the task workflow structure and the information shared in tasks before you draw an online workflow.  

For example, the approval workflow needs to collect the data from the initiator and share it with the team head. The team head needs to view, not change it. While approved claims could be passed to the team for processing with the approval note, rejected claims should be sent back to the requestor with particular reasoning. 

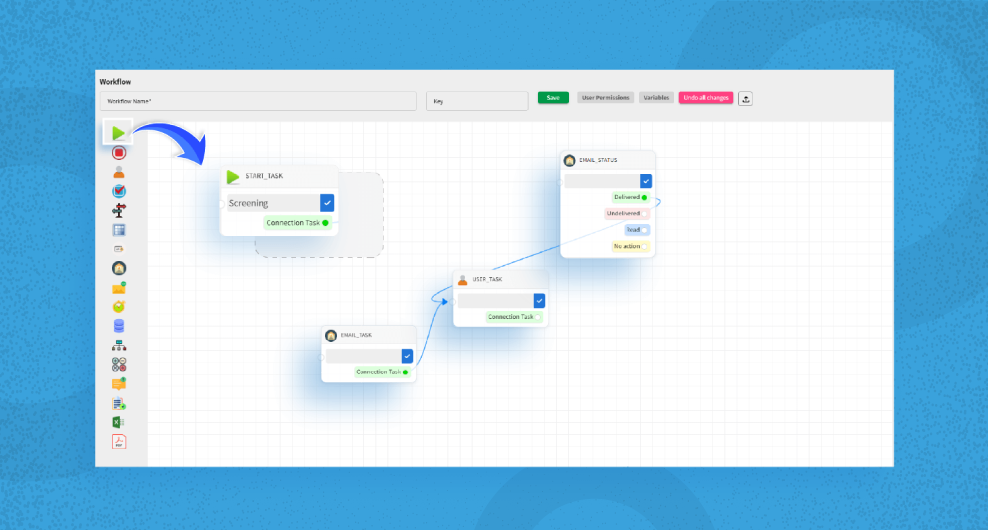
Step 3: Draw Workflow Diagram to Visualize

You can start to draw your workflow diagrams. You can obtain a visual representation of the overall workflow by designing a workflow diagram. Unless you are proficient with a business process automation model, suit for a workflow management tool with top features that lets you make online workflows by using drag and drop features.

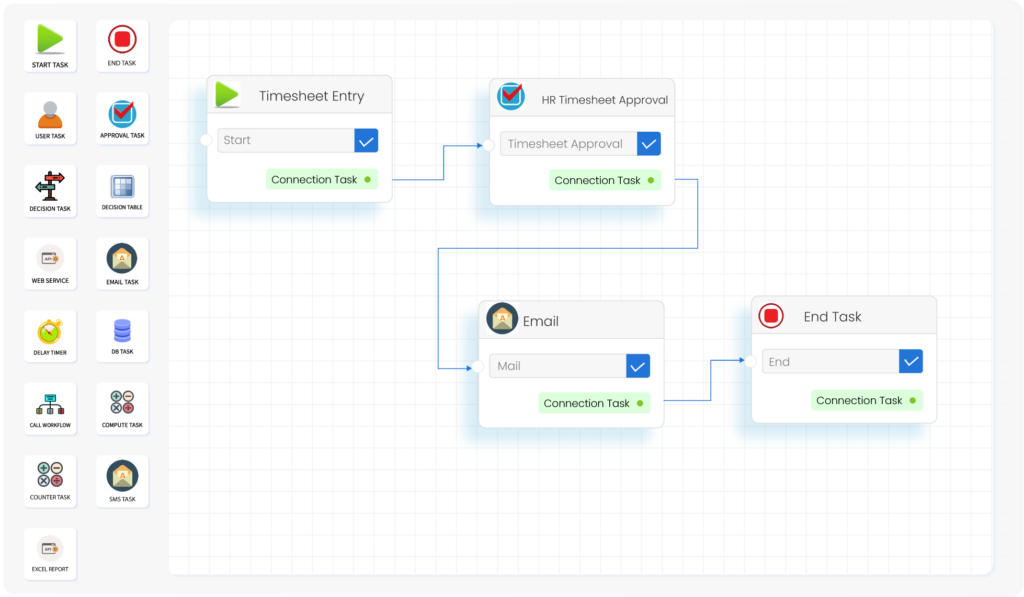
Choose a simple workflow management tool that is efficient enough to draw a workflow that is a modern version of the paper-based workflow.

Step 4: Workflow Testing

When you have built workflow, it should be the final step, right, not exactly. You can shift your business processes to an online workflow, using Yoroflow Workflow Automation, to streamline business processes without any testing. 

However, each workflow may look good. You will never know its imperfections unless you test it carefully. Instead of doing this step on your own, including the people who are part of your workflow. They will assist you to mention issues faster and finding out what works well. Fetch their suggestions and use the data to edit and enhance your automated workflow.

Step 5: Team Training

Your new workflow might look as appeal, yet that doesn’t seal. A proper training program will reduce unwanted hesitation and give them the confidence to handle a new workflow. Workflow diagrams and sharing the create workflow will help trainees get a good visual picture of where every task is situated, what the workflow does, and their role in the new workflow. 

Step 6: Deploy the Workflow 

Once you are completed with the testing and training step, your new workflow is ready to be deployed. Better to launch the workflow to a small team and examine how it works in real-time. Based on the outputs, you can either move on with your company.  
Also, you can go back and build a brand-new online workflow when you have a new need. If policy changes, you can opt to update the existing workflow or launch a new version.  

Conclusion

The phase of creating a new online workflow and executing it may seem like a big deal but with the right low-code workflow tool like Yoroflow, you can automate your workflow in no time.

Try Yoroflow Workflow Automation and check if it is the perfect solution for you to build online workflows.