Streamline your business operations and dynamic workflows in minutes.
Transform the way you manage your customer relationships with our cutting-edge CRM solution.
Optimize and streamline routine business processes to enhance operational efficiency.
Build an excellent customer support experience and boost agent productivity with Yorodesk.
Plan your projects, collaborate with your team, and track your work smartly.
Create, send, and analyze campaigns effortlessly for impactful communication.
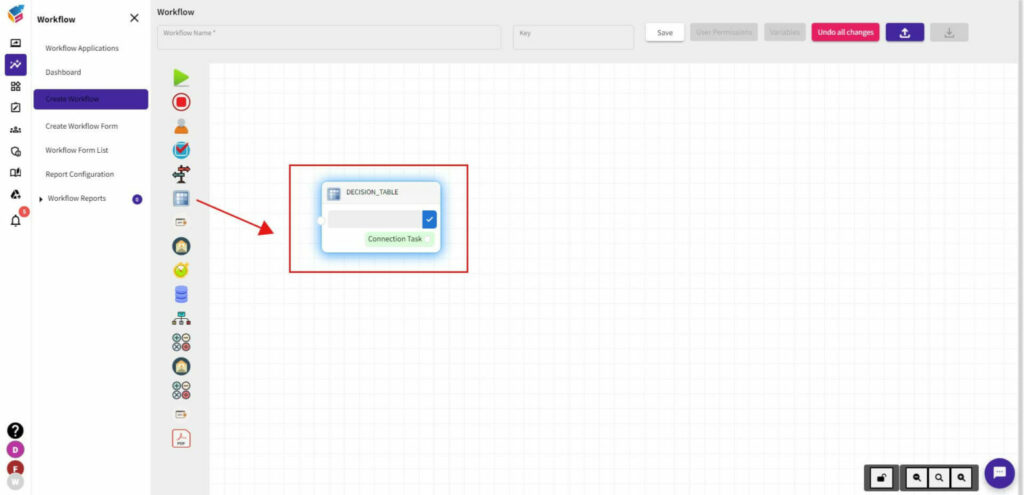
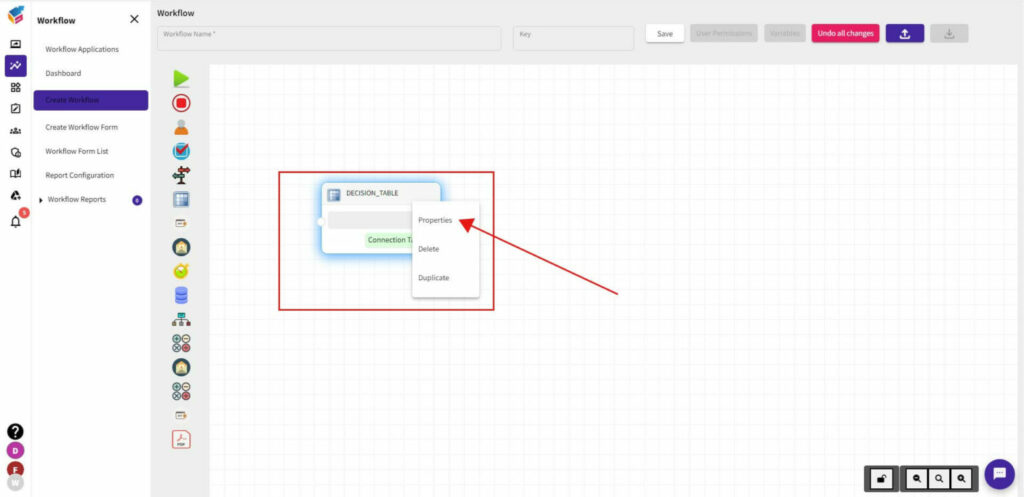
Yoroflow helps non-technical persons to develop connectivity without any software involvement.
Custom app builder speeds up the development process and reduces the need for IT resources.
Yoroflow’s workflow automation tool helps to automate your manual work and redundant tasks.
Build and manage your databases on Yoroflow’s cloud-based solution. No coding skills required.
Define the latest trend of businesses empowering non-IT employees to connect with IT teams.
Eliminates the need for manual coding and makes it easier to update & modify legacy applications.
Yoroflow is a workflow and process automation software that helps to streamline your work.
YoroCRM is a sales-focused solution that offers a intuitive interface and is particularly suited for small businesses.
Yoroproject is a cloud-based system that allows users to manage projects from anywhere.
Yorodesk’s helpdesk system is a great way to manage customer support requests.
Streamline your email marketing with an all-in-one platform for creating, sending, and analyzing campaigns.
Check out our latest new releases & changes on Yoro apps.
Learn more about the products & technology trends.
Official updates about products & launches from Yoroflow.
Get user guides for all Yoro products to help yourself
Answers & tips for all commonly asked questions about the products
Get started with available ready made no-code apps.
Watch Video tutorials, Webinars to stay up to date.
Avail our support services by raising a ticket or Livechat.
Reach out our sales team directly through phone.
Maximize your potential with cloud partners through licensing.
See how Yoroflow is helping people succeed in various fields.